Making Your Own Fermented Hot Sauce at Home

Did you know that a single gram of fermented chili peppers can contain millions of beneficial bacteria? This post covers the science, the gear, and the step-by-step process of making your own fermented hot sauce at home. Instead of buying store-bought bottles filled with vinegar and preservatives, you'll learn how to use lactic acid fermentation to create a sauce with complex, deep flavors that a standard bottle of Tabasco just can't match.
Fermentation isn't just about heat; it's about chemistry. You aren't just mixing peppers and salt. You're creating a controlled environment where Lactobacillus bacteria thrive, breaking down sugars and producing lactic acid. This process gives the sauce its signature tang and preserves the ingredients naturally.
What Gear Do I Need to Make Fermented Hot Sauce?
You need a sterile glass jar, a weight to keep ingredients submerged, and a way to manage gas buildup. You don't need a professional laboratory, but you do need quality tools to ensure your batch doesn't spoil.
First, grab a wide-mouth Mason jar. I personally prefer the 1-quart Ball Wide Mouth jars because they are easy to clean and the mouth is wide enough to pack in peppers without a struggle. You also need a way to keep your peppers under the brine. If your peppers float, they'll grow mold. You can use a glass fermentation weight, or if you're on a budget, a small piece of a cabbage leaf or even a clean, heavy ceramic plate works just fine.
Here is a quick checklist of the hardware you'll want on your counter:
- Glass Jars: Mason jars are the gold standard.
- Fermentation Weights: Keeps solids below the brine line.
- Digital Scale: For precise salt measurements (this is non-negotiable).
- Blender: A high-speed blender like a Vitamix or a Ninja helps achieve that silky texture.
- Fine Mesh Strainer: To remove seeds or excess pulp if you want a thinner sauce.
Don't forget the most important part: salt. But not just any salt. You want non-iodized salt. I use Diamond Crystal Kosher Salt or Cereals of the Earth sea salt. Avoid table salt with iodine or anti-caking agents—they can turn your beautiful sauce a weird, murky color and mess with the fermentation process.
How Much Salt Should I Use in My Brine?
You should aim for a brine concentration of 2% to 3% salt by weight relative to your total ingredients. This ensures the environment is salty enough to inhibit bad bacteria while allowing the good ones to do their work.
Calculating this isn't guesswork. If you just "eyeball" the salt, you might end up with a sauce that is either too salty to eat or too weak to ferment properly. Here is a simple breakdown of how to approach your brine ratios:
| Method | Salt Concentration | Best For |
|---|---|---|
| Low Salt (2%) | Very mild, faster fermentation | High-moisture vegetables |
| Standard (3%) | Balanced flavor and safety | Chili-based sauces |
| High Salt (5%+) | Slow, very stable fermentation | Long-term aging |
To do this right, weigh your peppers and any other vegetables (garlic, onions, etc.) first. Then, calculate the weight of the water you'll add. Finally, add the salt based on that total weight. It's a bit of math, but it's worth the effort to avoid a ruined batch.
What Are the Steps to Fermenting Hot Sauce?
The process involves prepping your ingredients, submerging them in a salt brine, and waiting for the fermentation to complete before blending. It's a slow game, but the results are far superior to any commercial sauce.
Step 1: Prep the Ingredients
Wash your peppers thoroughly. You can leave the stems on or take them off—it's your call. I like to use a mix of Habaneros for heat and Fresno chilies for a bit of color. Chop them up or leave them whole; it won't affect the fermentation, only the final texture once you blend it.
Step 2: The Brine Soak
Place your peppers, garlic cloves, and any aromatics into your jar. Pour your prepared saltwater brine over the top. Use your weight to ensure everything is completely submerged. This is where most people fail—if even a tiny bit of pepper sticks out above the liquid, you're asking for mold. (And trust me, you don't want to deal with that.)
Step 3: The Fermentation Phase
Seal your jar. If you're using a standard lid, you'll need to "burp" the jar once a day to release the CO2 buildup. If you don't want to deal with the daily chore of opening the jar, I highly recommend buying an Airlock Cap. These allow gas to escape while preventing oxygen from getting in. Let the jar sit in a cool, dark place for anywhere from 7 to 21 days.
Step 4: The Blend and Finish
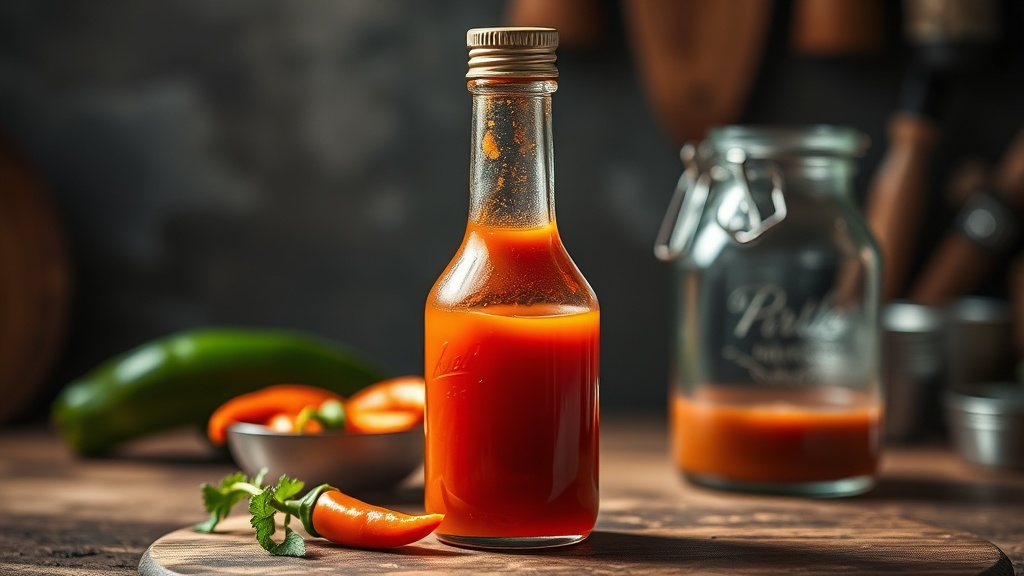
Once the pH has dropped and the flavor is sufficiently tangy, strain the solids from the brine. Save that brine—it's liquid gold. Put your peppers and aromatics into a blender. Add a splash of the fermentation brine back in to get the right consistency. This is also when you add your vinegar. Most people use Apple Cider Vinegar to add more depth, but white vinegar works if you want a sharper, cleaner bite.
The catch? The texture. If you want a professional-grade sauce, don't just blend it and call it a day. Run the blended sauce through a fine-mesh sieve to remove any stubborn skins or seeds. This creates that smooth, pourable consistency you see in high-end bottles.
After blending, you'll have a finished product that is living and breathing. If you want to stop the fermentation process entirely, you'll need to move the sauce to the refrigerator. The cold temperature slows the bacteria down significantly, which keeps your sauce from becoming overly sour over time.
One thing to keep in mind: the heat levels can change during fermentation. Sometimes the peppers actually become more mellow, and other times the capsaicin becomes more pronounced. It's a bit of a wild card. If you're looking for a scientific way to track progress, the CDC guidelines on food safety offer great insight into how pH levels affect shelf stability.
If your sauce develops a layer of white film on top, don't panic immediately. It might be Kahm yeast, which is harmless but can affect the flavor. However, if you see fuzzy mold that is green, black, or colorful, throw the whole batch away. There's no way to "save" a moldy ferment. It's better to start over than to risk a bad experience.
The beauty of this process is that you can experiment. Want to add roasted carrots for sweetness? Go for it. Want to throw in some ginger for a kick? Absolutely. Once you master the 3% brine rule, you have a foundation that you can tweak to your specific palate. It's a skill that takes a few tries to perfect, but once you hit that sweet spot of heat, acid, and funk, you'll never go back to the grocery store shelf again.
Steps
- 1
Prepare Your Ingredients and Jars
- 2
Create the Brine Solution
- 3
Pack the Peppers into the Jar
- 4
Monitor the Fermentation Process
- 5
Blend and Bottle the Sauce